🕵️
This guide provides a quick overview of uploading and using your data across multiple agents within Agent700.
1. Upload and Process
Start a new conversation in Agent700. Upload your document through the “Upload File” icon. Agent700 processes the document and makes the content ready for analysis. This includes extracting text from images.
2. Check and Organize
2.1 Review Uploaded Data:
While all document processing systems can encounter occasional issues like content appearing out of order or unreadable characters, Agent700 prioritizes accuracy. We provide a dedicated review step, allowing you to ensure your data is correctly interpreted before analysis, giving you greater confidence in your results.
2.2 Ask your query:
Once you’ve reviewed the uploaded data and are satisfied with its accuracy, you can enter your query directly beneath it. Just type in your question or request, and hit send to let Agent700 get to work.
3. The Data Library
The Data Library helps you manage your information within Agent700.
3.1 Adding Data
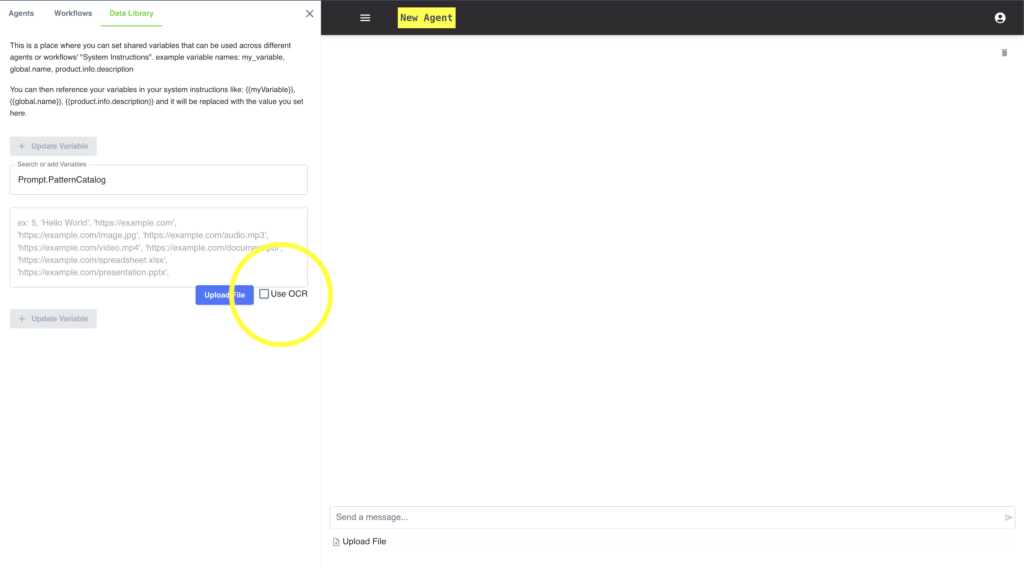
To add your document to the data library, give it a clear name, ideally using a structured format (e.g., “HR.Onboarding.Checklist”). This helps you find it quickly later on.
3.2 Upload with OCR
To add a document to your Data Library, click the “Upload File” button. Just like in a conversation, Agent700 will process the document and make its content readily available for analysis. If your document contains images with text, Agent700 will automatically use Optical Character Recognition (OCR) to extract that text and make it searchable, too.
3.3 Data within the Library
Once a document is added to your Data Library, you can always review its content to ensure accuracy, just like when you upload a document directly into a conversation. You can also add additional details or instructions to the data element. For example, you might add a note about the source of the data or highlight key takeaways. This ensures all relevant context is readily available when you reference the document in future conversations or tasks.
4. Accessing Your Data Library
You can access information stored within your Data Library in two ways: directly through the query input within a conversation or through system instructions.
4.1 Accessing Data
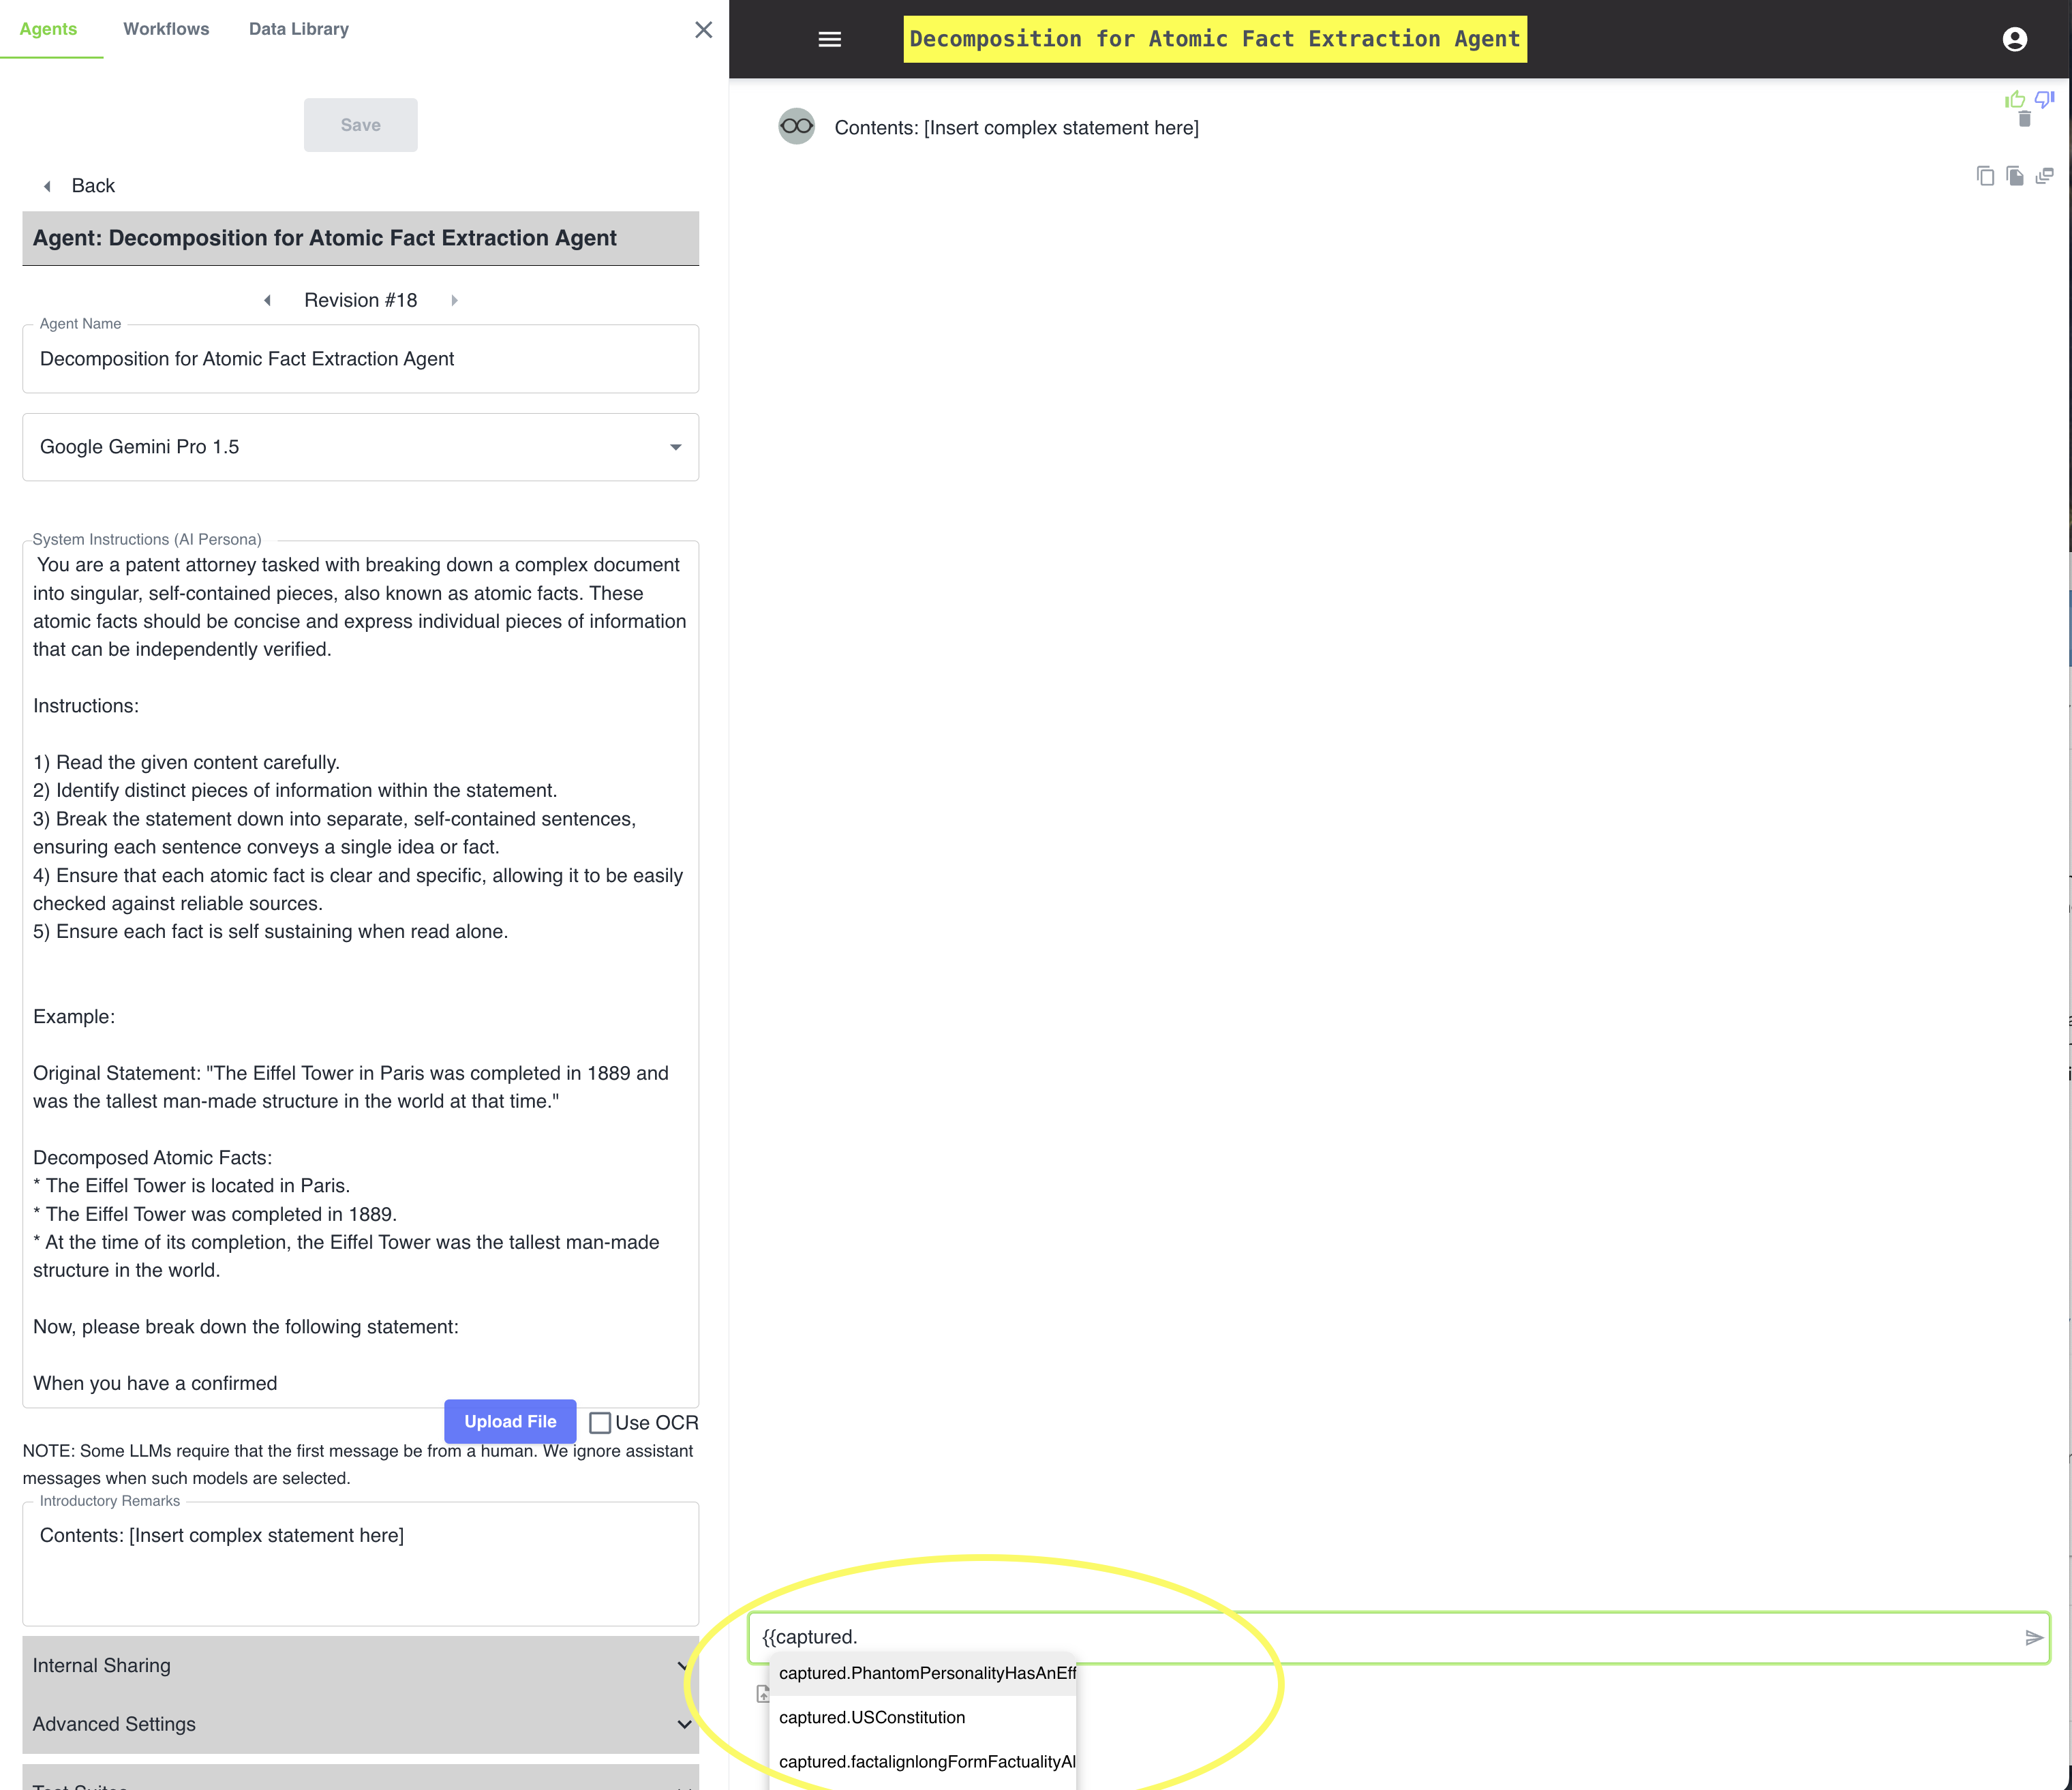
Accessing your saved data within Agent700 is simple. When you begin typing within the query input field, Agent700 will automatically suggest data elements that match your text. To reference a specific data element from your library, enclose the name within double curly braces: {{Data.ElementName}}. For example, to access information from a document titled “Financial.Reports.Q3”, you would type {{Financial.Reports.Q3}}. This direct referencing makes it easy to analyze specific datasets and ensures clarity in your instructions to Agent700.
4.2 Accessing via Query Input
Within any conversation, you can directly reference documents from your Data Library. For example, if you have a document named “Sales.RegionalData.2023” in your library, you could ask Agent700: “What were the top-performing regions according to the Sales.RegionalData.2023 document?”
4.3 Accessing via System Instructions: For Advanced Control
System Instructions provide a powerful way to manage complex tasks or multi-step analyses within Agent700. They give you fine-grained control over:
- Data Sources: You can direct Agent700 to access and combine data from multiple documents within your Data Library, as well as external sources you specify.
- Analysis Parameters: Clearly define the scope of analysis, including specific calculations, comparisons, or data transformations.
- Output Format: Specify how you want Agent700 to present the results, such as a summary report, a chart, or integration with another application.
Example:
Instead of simply asking “What were last quarter’s sales?”, a System Instruction might look like this:
“Analyze sales data from ‘Sales.Transactions.Q4’ and ‘Customer.Demographics’ to identify the top-performing customer segments by region. Generate a bar chart visualizing the results and export it as a PowerPoint slide.”
By using System Instructions, you guide Agent700 to perform sophisticated tasks, saving you time and unlocking deeper insights from your data.
Agent700’s Data Library, combined with its flexible query input and powerful System Instructions, gives you complete control over your data. You can easily organize, analyze, and extract insights from your documents, transforming your interactions with information and unlocking the full potential of your data within a secure and user-friendly environment.


